--------------------------------------------------------------------------------------------------
13.05.2012
New apartment with enough space for further expansion for my cockpit. The old pc chair, I changed with a new luxury leather armchair.


--------------------------------------------------------------------------------------------------
30.12.2011
The MIP is already finished. Now remains the sioc script so that all together with the Sim Avionics software can work.

A few pictures from the last assembling


--------------------------------------------------------------------------------------------------
22.12.2011
A few more steps and everything will be completely finished


--------------------------------------------------------------------------------------------------
03.12.2011


--------------------------------------------------------------------------------------------------
26.11.2011


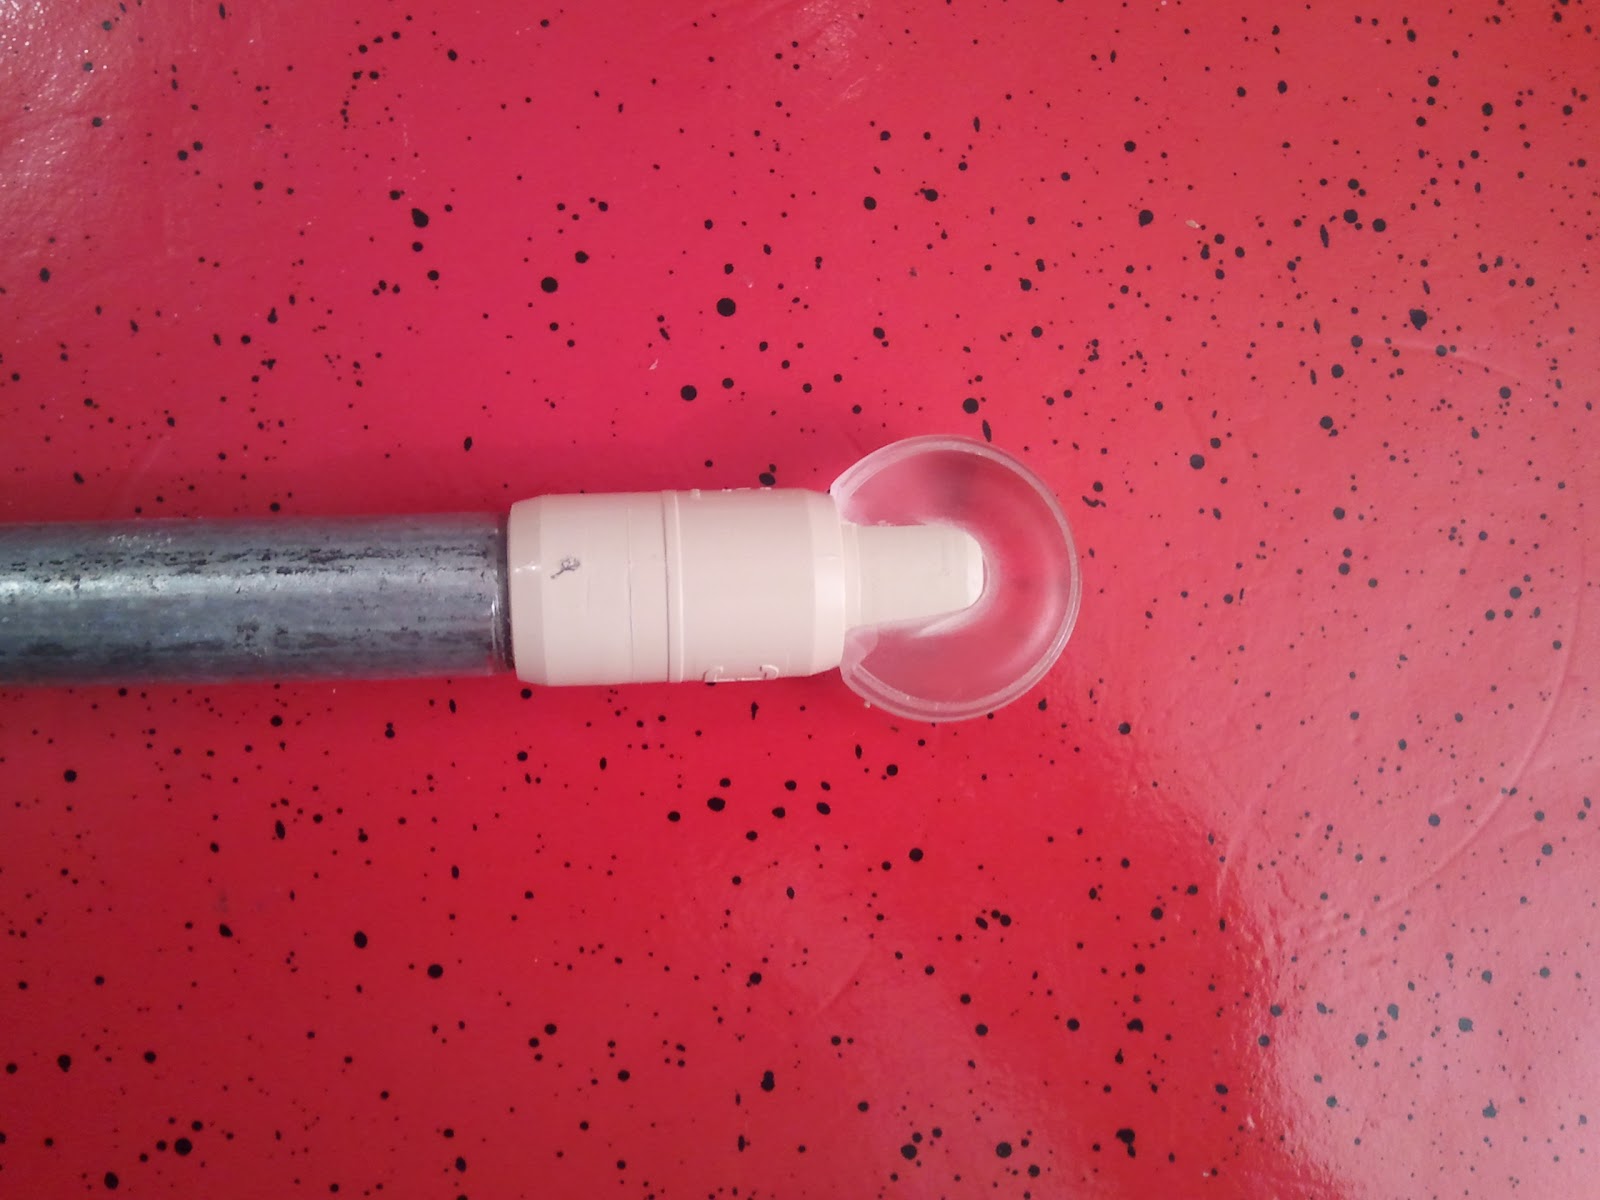
Even so, I started with the landing gear lever.

For the lever I use 1/2" water pipe and two plastic sleeves.


--------------------------------------------------------------------------------------------------
30.10.2011


--------------------------------------------------------------------------------------------------
28.10.2011
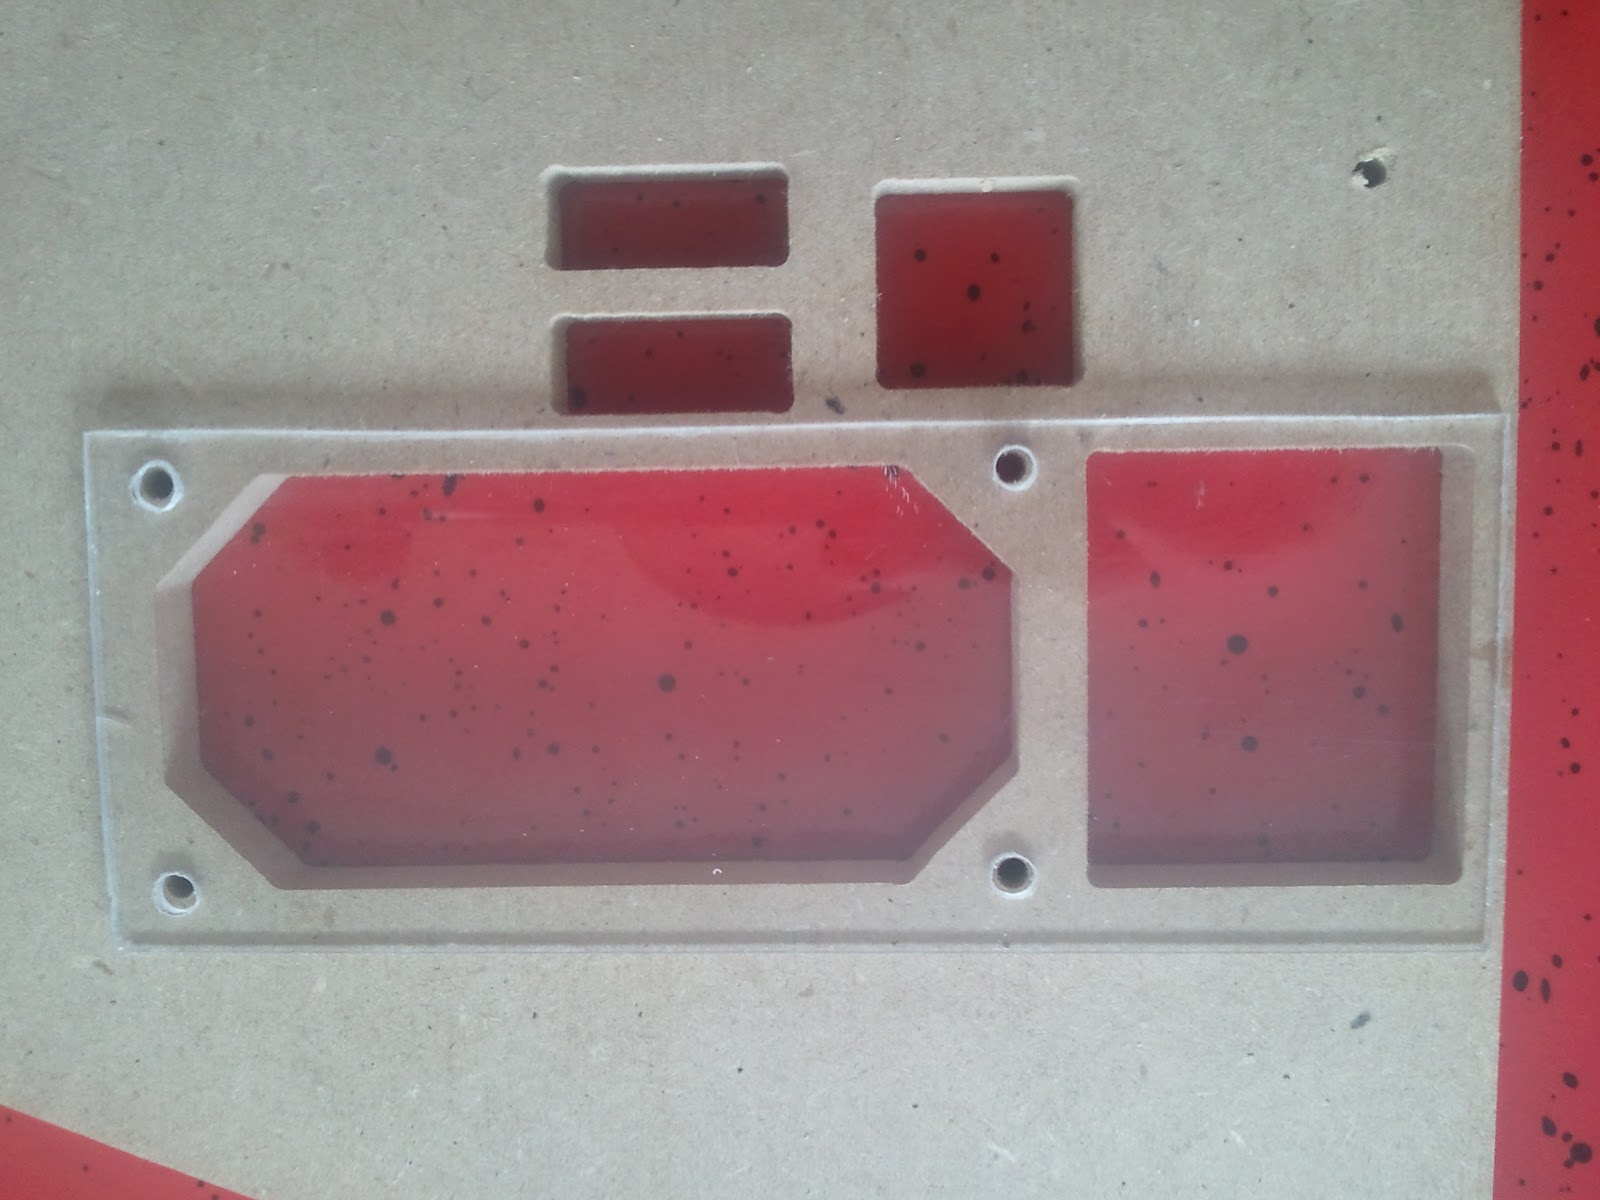
1 mm transparent foil


Can very well reshape by hot air


--------------------------------------------------------------------------------------------------
25.10.2011
Current Picture

Preparation for attachment of stand-by instruments


--------------------------------------------------------------------------------------------------
16.10.2011
My B737NG YAW DAMPER gauge is already finished. I've only used an old DVD-ROM and a servo motor. how I made it you can see in my video:
--------------------------------------------------------------------------------------------------
02.10.2011 Landing gear panel
flaps gauge
USB servo motors card
spray paint Boeing gray (RAL7011)
"Auto Brake" and "Flaps" annunsiators.
The places for the display glasses were milled.


I have cut the hole for the gear lever on the MIP because it is too small.


All panes assembled


--------------------------------------------------------------------------------------------------
17.09.2011
Now I continue with a few new orders.
1. Expect a GLB Landing Gear Knob to come.
2. For display of all the instruments I need three TFT monitors, namely:
1x7 "- for the hrono digits
1x19" widescreen - for the PFD and ND
1x15"- for the standby instruments and EICAS
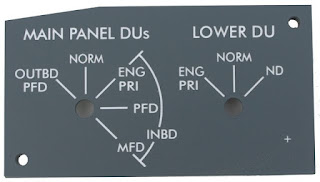
Captain System Annunciator Panel and Master Lights
ADF Stand-by Bezel
ISIS Stand-by Bezel
3 x Display Glass
--------------------------------------------------------------------------------------------------
03.09.2011


As a next step come the buttons. On the back plates I have prepared 5mm holes for the LED's.

And then glued together.


Assembling and cabling.


--------------------------------------------------------------------------------------------------
29.08.2011

As you can see the both panels do not fit with the MIP panel. At this point I have to improvise to fit everything together.

First of all I have prepared two additional panels.

One is on the front side and the other on the back of the MIP panel.

Also the hole must be sanded sideways.

Now I have everything to build the panels together.


Almost everything is done with the exception of the three buttons.

--------------------------------------------------------------------------------------------------
19.08.2011
Today I have made the "ENG" and "SYS" buttons. The lettering is engraved. The other parts I have cut out of plexiglass and glued together.


Then comes the paint.


And the assembling.


Today I have made the "ENG" and "SYS" buttons. The lettering is engraved. The other parts I have cut out of plexiglass and glued together.


Then comes the paint.


And the assembling.


--------------------------------------------------------------------------------------------------
27.07.2011
Adjusting chrono to the MIP.


--------------------------------------------------------------------------------------------------
25.07.2011
The sticking with the switch was not the best idea, because the surface is made of metal. Now I use the procedure proposed by Opencockpits Round black button switch. For that I should have cut an extra panel of plexiglass. Here are the pictures:


--------------------------------------------------------------------------------------------------
22.07.2011
The cabling


--------------------------------------------------------------------------------------------------
19.07.2011
I've cut the rear panels of plexiglass and assembled with the switches.
The panels are ready and waiting for cabling.


--------------------------------------------------------------------------------------------------
17.07.2011
Today I started with the assembling. The first thing I wanted to know was how the annunciators look with lighting.


For panel backlighting I've decided to use 12V LED strip. Very good result!


For the Clock keys I will use Tactile switch OMROM B3F4050 from Opencockpits. The switches will be glued to the rear of the panel.
I have changed my plan. Please see my post from 25.07.2011 above.
I have changed my plan. Please see my post from 25.07.2011 above.

The switches should be sanded to adapt.
--------------------------------------------------------------------------------------------------
10.07.2011
Today I ordered from Opencockpits Captain's annunciator set. Here is a picture of it:

In addition I have also ordered all need switches, LEDs, micro buttons and a switch safe guard - black.
--------------------------------------------------------------------------------------------------
05.07.2011
I have currently not enough space so I have decided at the first time to build only captain side. This Gold Medal Sim Parts MIP is ideal for this purpose. Very good cut in original size and also the price is reasonable.


--------------------------------------------------------------------------------------------------
29.06.2011
The products have a very good quality. All SISMO panels are with possibility for backlighting and also there are integrated screws to attach the rear panel with the switches.

--------------------------------------------------------------------------------------------------
03.06.2011
It's time to concentrate me on my MIP, therefore I bought a OC Master card. This allows to connect all the switches and LED indicators.
In order to connect the master card with the PC I also need a USB expansion card.
--------------------------------------------------------------------------------------------------
Status 25.10.2010
In progress


